

Amazon Product Images: Best Practices That Actually Drive Sales
Trying to sell stuff on Amazon? It can feel like a jungle out there. You’ve got your product, you think the price is right, and you’ve even done some keyword stuff. But if your pictures aren’t up to snuff with Amazon’s rules, your listing might just get lost or, worse, ignored. Your product photos are basically your online salespeople. They’re the first thing people see, and often, they’re what makes someone click ‘buy’ instead of just scrolling past. The tricky part? Amazon has some pretty strict rules for images, and not following them can really hurt your chances of making sales.
Key Takeaways
- Amazon has specific rules for product images to keep listings looking good and trustworthy for shoppers.
- Main images need a plain white background, show the whole product, and be at least 1,000 pixels on the longest side.
- Extra images can help sell more by showing size, how the product is used, and close-up details.
- If your images don’t follow the rules, Amazon might hide your listing, which means fewer people see it and you make fewer sales.
- Spending money on good, compliant images is one of the best ways to boost your Amazon sales without spending a ton.
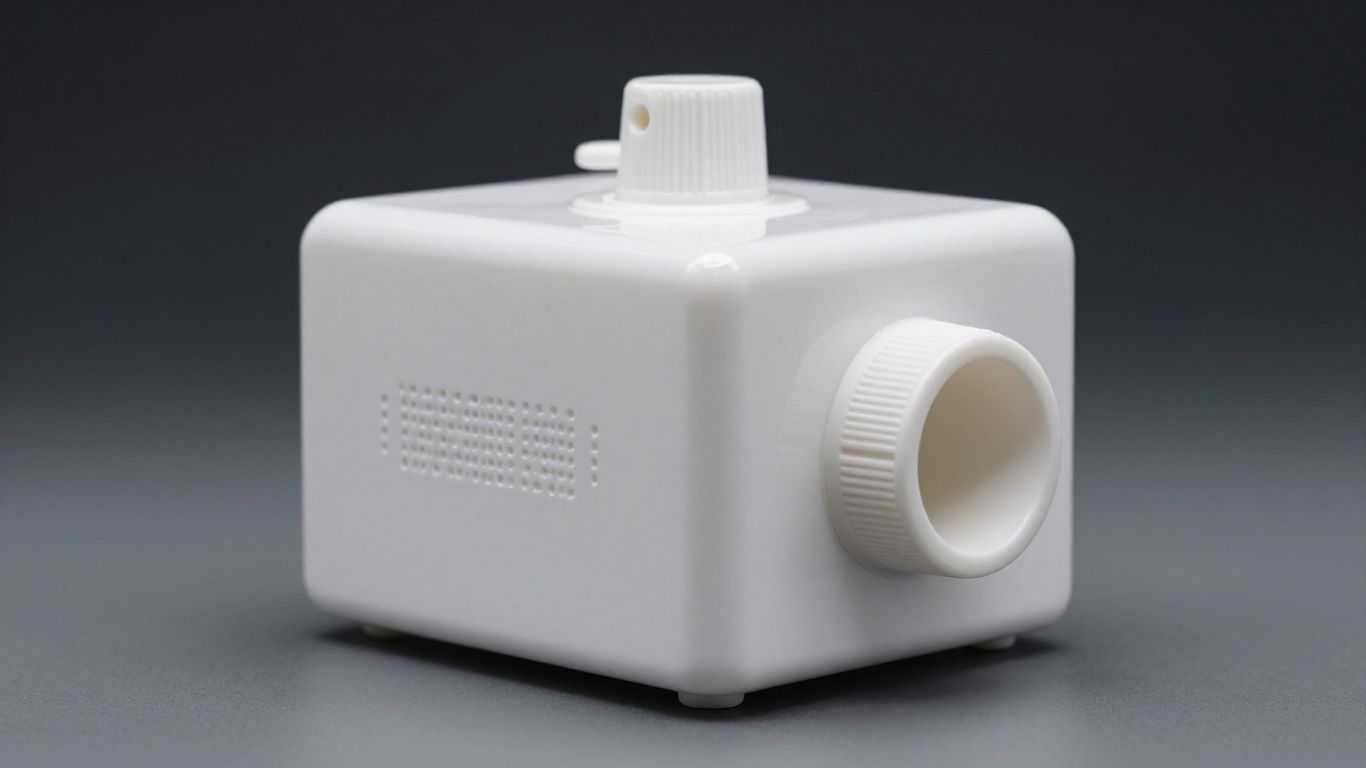
1. Pure White Background
When you’re listing a product on Amazon, the very first image, the one people see in search results and on the product page, needs to be super clean. We’re talking a pure white background. Think RGB values of 255, 255, 255 – that’s the standard. This isn’t just about looking nice; it’s about blending in with Amazon’s own interface. When your product pops out against a clean white, it grabs attention way better than if it’s lost in a busy background.
This main image, often called the ‘hero’ image, has some strict rules:
- It must show only the product being sold. No extra stuff, no accessories unless they’re part of the main item. And definitely no text, logos, or watermarks. Amazon wants to see the product, plain and simple.
- The product itself should take up a good chunk of the photo. Aim for at least 85% of the image space. This makes sure customers can see what they’re actually buying, even when they’re just scrolling.
- No packaging unless it’s a key feature. If the box is part of the appeal, like a gift set, maybe. Otherwise, show the product itself, not its box.
Using a pure white background for your main image helps your product stand out in search results and on the product detail page. It creates a consistent look across the platform and ensures the focus remains squarely on what you’re selling.
While other images on your listing can get a bit more creative with backgrounds, that first impression image needs to be spotless. It’s the digital equivalent of a well-lit, uncluttered storefront window. It tells the customer, ‘Here’s the product, no distractions.’
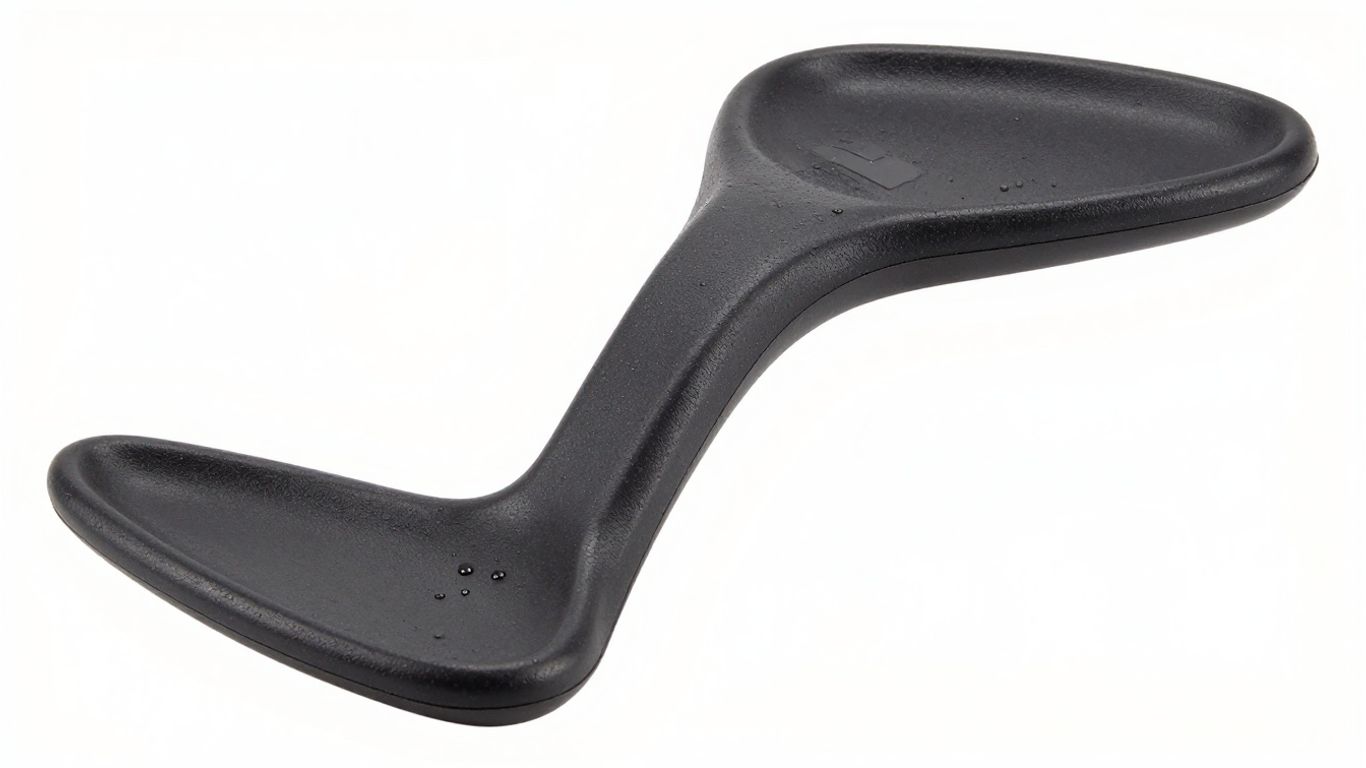
2. High-Resolution Photography
When customers can’t physically touch your product, your images are the next best thing. That’s why using high-resolution photography is super important. Blurry, pixelated photos just don’t cut it. They make your product look cheap and untrustworthy, and honestly, people will just scroll right past.
You need images that are sharp, clear, and show every detail. This means investing in good equipment or hiring a professional photographer. Amazon actually has specific requirements for image size and resolution. For the main image, they recommend at least 1,000 pixels, but 2,000 pixels is even better if you want the zoom feature to work well. This allows shoppers to really inspect the product up close, which builds confidence.
Here’s a quick rundown of what makes a good high-resolution image:
- Clarity: No blurriness or pixelation. Everything should be crisp.
- Detail: The image should be sharp enough to show textures, materials, and small features.
- Zoom Capability: Higher resolution allows customers to zoom in and examine the product closely.
- Accurate Color: The colors in the photo should match the actual product as closely as possible.
Think about it this way: if your product is complex or has many small parts, low-resolution images will hide those details. Customers might miss something they really like, or worse, they might assume a lack of detail means poor quality. Getting this right can really help reduce returns because customers know exactly what they’re getting.
Don’t skimp on image quality. It’s one of the most direct ways to communicate professionalism and quality to potential buyers. A sharp image can make a good product look great, while a bad image can make a great product look mediocre.
3. Hero Image
The hero image is the very first thing a potential buyer sees when they search for a product on Amazon. It’s the main picture that shows up in search results and on the product page before someone clicks to see more. Because of this, it has to be spot-on. This image is your product’s first impression, and it needs to grab attention and clearly show what you’re selling.
Think of it like the cover of a book. If the cover doesn’t look good or tell you anything about the story, you’re probably going to pass it by. The same goes for your Amazon listing. Your hero image needs to be professional, high-resolution, and feature the product on a pure white background (RGB 255, 255, 255). It should show the entire product clearly, without any packaging unless the packaging itself is a key feature.
Here are some key things to remember for your hero image:
- Show the whole product: Make sure the entire item is visible and not cut off by the edges of the frame. The only exception is jewelry, like necklaces.
- No extra stuff: Don’t include accessories or props that aren’t part of the main product being sold, as this can confuse shoppers.
- Professional quality: Use actual photos of the product. No illustrations, mock-ups, or graphics are allowed.
- Single item focus: Unless the product is sold as a set, the hero image should only show one unit of the item.
While you can’t add text or graphics to the hero image itself, you can use other images, like infographics, to add more details about your product’s features and benefits later on in the listing. For example, if your product comes with multiple parts, the hero image should show the main item, and then you can use other images to detail what’s included. This helps shoppers understand the full value of your offering quickly. You can also explore Amazon A+ Content to add even more rich media to your product pages.
4. Infographics
Infographics are a great way to quickly show off what makes your product special. Think of them as a visual cheat sheet for potential buyers. The goal is to give customers confidence that your product will solve their problem.
When creating an infographic, keep it simple. Focus on the most important features, usually no more than four. You want to be clear and direct, highlighting only the information that truly matters to your customer. Too much text or too many points can overwhelm people, and they’ll just scroll past.
Here are some tips for making effective infographics:
- Focus on Benefits: Instead of just listing features, explain how those features help the customer.
- Use Clear Visuals: Pair your text with simple icons or graphics that make the information easy to grasp.
- Keep Text Concise: Aim for short phrases, maybe four words max per point, to get your message across fast.
- Consider Combining with Lifestyle Images: Showing your product in use alongside the infographic can really help people picture themselves using it.
Infographics should reassure buyers that the product works. They need to be complete enough to make someone certain about the product’s usefulness, but not so cluttered that they become hard to read.
Make sure the text size is easy to read on any device. You don’t want people squinting or zooming out just to understand what you’re saying. If your product involves interaction, like a tool or a gadget, consider showing hands using it. This adds a human touch and helps buyers connect with the product’s use.
5. Lifestyle Images
Think about how someone actually uses your product. That’s where lifestyle images come in. They show your item in a real-world setting, helping potential buyers picture themselves using it. This makes the product feel more relatable and solves a problem they might have.
When you’re creating these images, focus on showing the product in action. If you’re selling a coffee maker, show someone enjoying a cup of coffee in the morning. If it’s a backpack, show someone hiking with it. The key is to make it look natural and aspirational.
Here are a few things to keep in mind:
- Show interaction: The person in the photo should be actively using or engaging with the product. Avoid just having them stand next to it.
- Focus on the benefit: What problem does your product solve? Show that solution in the image. For example, a comfortable chair might show someone relaxing after a long day.
- Keep it clean: While it’s a lifestyle shot, the product should still be the star. Don’t let the background or other elements distract from what you’re selling.
- Add brief text: Sometimes, a few words explaining a key feature or benefit can be helpful, but keep it short and easy to read. Think four words max.
These images bridge the gap between a product’s features and a customer’s needs. They tell a story that a plain product shot can’t.
Using lifestyle photos is a smart way to boost your Amazon listing’s appeal and can really help with optimizing your listings. They give customers a better sense of the product’s value and how it fits into their lives.
6. Multiple Angles
Think about it, when you’re shopping for something in a store, you don’t just look at it from one side, right? You pick it up, turn it around, check out the back, maybe even peek underneath. Online shoppers can’t do that, so it’s up to your product images to give them the full picture. Showing your product from various angles is super important for building trust and helping customers feel confident about their purchase.
Don’t just show the front; show them everything. This means getting shots from the side, the back, the top, and the bottom if it’s relevant. For things like electronics, show the ports. For furniture, show how the back looks. For clothing, show the seams or the way it drapes.
Here’s a quick rundown of why showing multiple angles matters:
- Builds Confidence: Seeing all sides reduces uncertainty and makes the product feel more real.
- Highlights Features: Different angles can reveal details or features that aren’t obvious from a single view.
- Prevents Returns: When customers know exactly what they’re getting, they’re less likely to return it because it wasn’t what they expected.
- Shows Scale and Proportion: Sometimes, seeing a product from the side or back helps customers understand its size better.
For instance, if you’re selling a backpack, you’ll want to show the front with all the pockets, the side profile, the back to show the straps and padding, and maybe even the bottom to show its stability. It’s about giving them a 360-degree view, or as close to it as you can get with still images. This thoroughness really makes a difference in how customers perceive your product and, ultimately, whether they click ‘buy’.
7. Close-Up Details
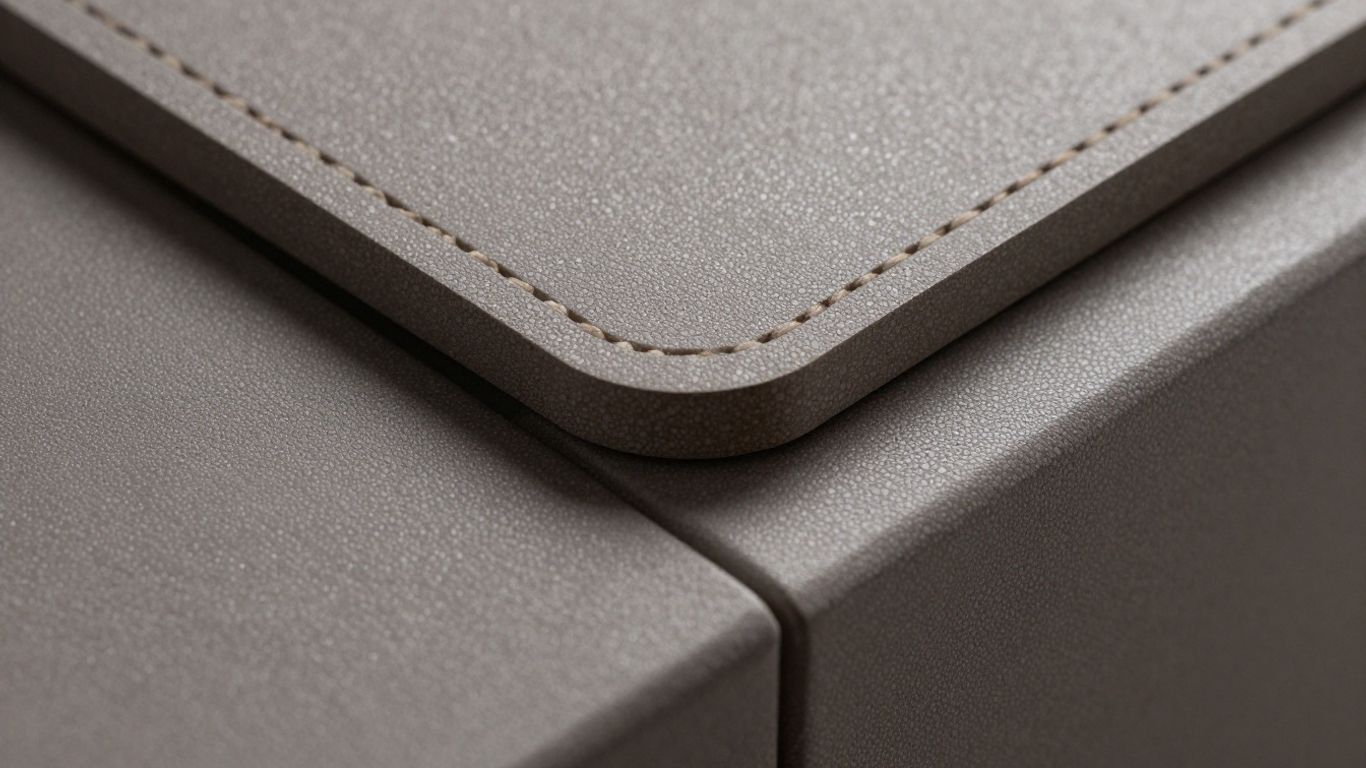
Sometimes, the most important selling points aren’t obvious from a distance. That’s where close-up shots come in. Think about the little things that make your product stand out. Does it have a special texture? A unique stitching pattern? A clever mechanism? Showing these details up close helps customers appreciate the craftsmanship and quality.
Don’t assume customers will notice every feature; highlight the ones that matter most. For instance, if you’re selling a backpack, a close-up of the reinforced stitching on the straps or the smooth glide of the zippers can make a big difference. It’s about building trust and showing you’ve thought about the little things.
Here are some details you might want to zoom in on:
- Materials: Show the weave of a fabric, the grain of wood, or the finish on metal.
- Construction: Highlight how parts are joined, the quality of seams, or any special assembly.
- Functionality: Capture a close-up of a button, a dial, or a connection point that demonstrates ease of use.
- Unique Features: If there’s a specific patent-pending part or a special coating, get a clear shot of it.
Customers often make purchasing decisions based on perceived quality and durability. Close-up images are your best tool for demonstrating these attributes directly, answering questions before they’re even asked.
8. Product Scale
People can’t hold your product through a screen, so you’ve got to give them a sense of its size. This is where showing product scale comes in handy. Without it, customers might get the wrong idea, leading to disappointment and returns. Imagine someone expecting a full-sized blender and getting a mini one – not a great start.
It’s all about managing expectations visually.
Think about how you can show your product next to something familiar. This could be a common object, a hand, or even a person. For smaller items, showing them in a typical setting helps. For instance, a tiny electronic component might be pictured next to a coin, or a piece of jewelry could be shown on a model.
Here are a few ways to get this right:
- Use common objects: Place your product next to everyday items like a pen, a coffee mug, or a smartphone. This gives an instant reference point.
- Show it in use: A lifestyle shot where someone is interacting with the product naturally demonstrates its size in a real-world context.
- Include dimensions: While not strictly a visual scale, an infographic clearly stating the product’s dimensions (height, width, depth) is vital. Pair this with a visual representation if possible.
Don’t try to trick people by making a small item look huge. It just backfires. Be honest with your visuals. If your product is meant to be compact, show it that way. This builds trust and leads to happier customers. Getting your product images right is a big part of Amazon Sponsored Products success.
Showing your product’s true size helps customers make informed decisions. It reduces the chance of them feeling misled and ultimately cuts down on returns. Honesty in your visuals is key to building a good reputation.
9. Before-And-After Photos
Sometimes, the best way to show what your product does is to show the problem it solves. Before-and-after photos are fantastic for this. They visually demonstrate the transformation your product brings about, making the benefit super clear.
Think about products that fix a common issue. For example, a stain remover, a cleaning tool, or even a skincare product. Showing the ‘before’ state – the mess, the problem, the imperfection – and then the ‘after’ state – the clean, the solution, the improvement – really hits home.
This visual contrast helps customers immediately grasp the value proposition. It’s a powerful way to connect with their pain points and show them exactly how your product can make their lives better.
Here’s how to make them work for you:
- Clearly show the problem: Make sure the ‘before’ image highlights the issue your product addresses. Don’t be shy about showing the struggle.
- Highlight the solution: The ‘after’ image should be bright and clear, showcasing the positive result of using your product.
- Keep it consistent: Use similar lighting and angles for both shots so the comparison is fair and easy to see.
- Use minimal text: Let the images do most of the talking. A short caption might be okay, but the visual should be the star.
These types of images are especially useful for products that offer a tangible improvement. They can be a great addition to your product carousel, especially when you’re trying to explain a complex benefit or a dramatic change. Learning how to master product photography can really help you create these impactful images for any platform.
Before-and-after photos tap into a basic human desire for improvement and problem-solving. When done right, they create an instant connection with potential buyers by showing them a clear path from their current frustration to a desired outcome.
10. Camping Chair
When you’re selling a camping chair on Amazon, think about what someone actually does with it. It’s not just a chair; it’s about the experience. Show it set up next to a campfire, or maybe someone relaxing in it with a book and a drink. These lifestyle shots help potential buyers picture themselves using the chair.
Focus on the key benefits that matter most to campers. Does it fold up super small for easy transport? Show that. Is it extra sturdy for uneven ground? Demonstrate that. People want to know it’ll work for their specific outdoor adventures.
Here are some things to highlight:
- Portability: Show how compact it is when folded, maybe fitting into a car trunk or a carrying bag. This is a big deal for anyone hauling gear.
- Comfort: If it has special padding or a unique design for back support, make sure that’s visible. A shot of someone looking genuinely relaxed is worth a thousand words.
- Durability: Show it on different terrains – grass, dirt, maybe even a slight incline. If it has a strong frame, make sure that’s clear.
- Ease of Use: A quick shot of someone unfolding or refolding it can show how simple it is.
Think about what makes your chair stand out. Is it lighter than others? Does it have built-in cup holders or a side table? These are the details that can make a sale. You can even use a simple infographic to list out the main specs like weight capacity, dimensions when open and closed, and material type. This gives shoppers all the important info at a glance.
Don’t just show the chair sitting there. Show it in action. People buy into the lifestyle and the solution your product provides, not just the item itself. Make it easy for them to see themselves enjoying the outdoors with your chair.
Looking for the perfect camping chair? We’ve got you covered with top picks that offer comfort and durability for your outdoor adventures. Make your next trip unforgettable by choosing the best seat. Visit our website today to explore our full selection and find your ideal camping chair!
Wrapping It Up: Your Images Are Your Sales Team
So, we’ve gone over a lot of stuff about Amazon images. It might seem like a lot, but really, it boils down to a few key things. Your pictures are the first thing people see, and they have to be good. Not just okay, but really good. They need to follow Amazon’s rules, sure, but more importantly, they need to show customers exactly what they’re getting and why they need it. Think about using lifestyle shots so people can picture themselves using your product, and infographics to quickly point out the cool features. Don’t forget about mobile – most people shop on their phones these days. Keep your images looking sharp and consistent across your listings. It takes a bit of effort, maybe even hiring a pro, but getting your images right is one of the best ways to get noticed, build trust, and ultimately, sell more stuff on Amazon. It’s really that simple.
Frequently Asked Questions
What’s the most important thing about Amazon product pictures?
Your product pictures are like your salesperson on Amazon. They’re the first thing people see and can make them decide to buy or keep looking. Good pictures help people trust your product and understand what it does.
Can I use any background for my main product picture?
No, Amazon requires the main picture to have a plain white background. This makes your product stand out clearly and look professional, just like it belongs on the Amazon site.
Why do my pictures need to be high quality?
High-quality pictures, meaning they are clear and not blurry, let shoppers zoom in to see all the details. This builds confidence and helps them feel sure about their purchase. Amazon also needs them to be at least 1000 pixels wide.
What’s the difference between a hero image and other images?
The hero image is the main picture you see first, and it must show only the product on a white background. Other images, like lifestyle shots or infographics, can show the product in use or explain its features, and they don’t need a white background.
Can I put text or special offers on my main picture?
No, you can’t add text, logos, sale prices, or words like ‘Best Seller’ to your main product image. Amazon wants that picture to be clean and show just the product. You can use other images to share this extra information.
How many pictures can I upload for my product?
You can upload up to seven images for each product. It’s a good idea to use most of these slots to show your product from different angles, in use, and highlight its best features to help customers make a decision.

